Why Are Companies Automating Sanding?
Steps to Automating Your Sanding Process
Consider Your Application
The first step in implementing automated sanding into your process is to take into consideration the desired workpiece. You should analyze the size, shape, material composition, and the surface (whether it is flat, curves, or uneven). This all will dictate the technique as well as the abrasive media that you will use.
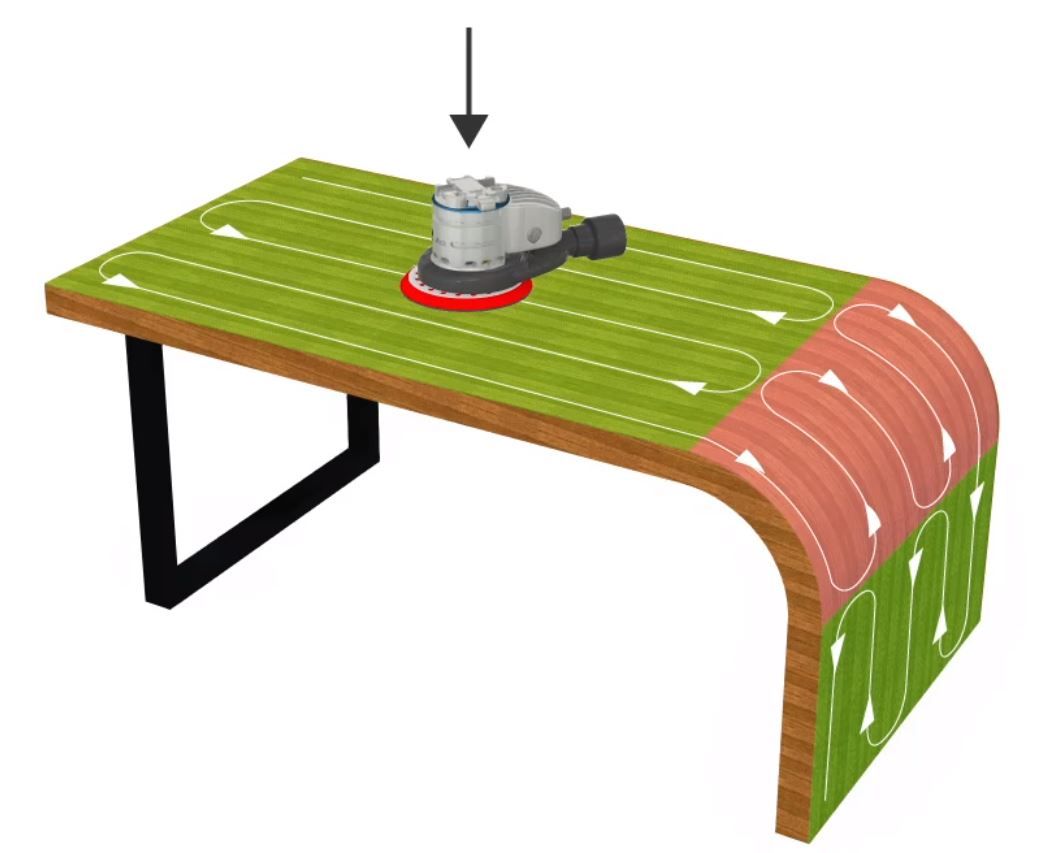
Let's look at an example: We'll use the wooden coffee table pictured below.
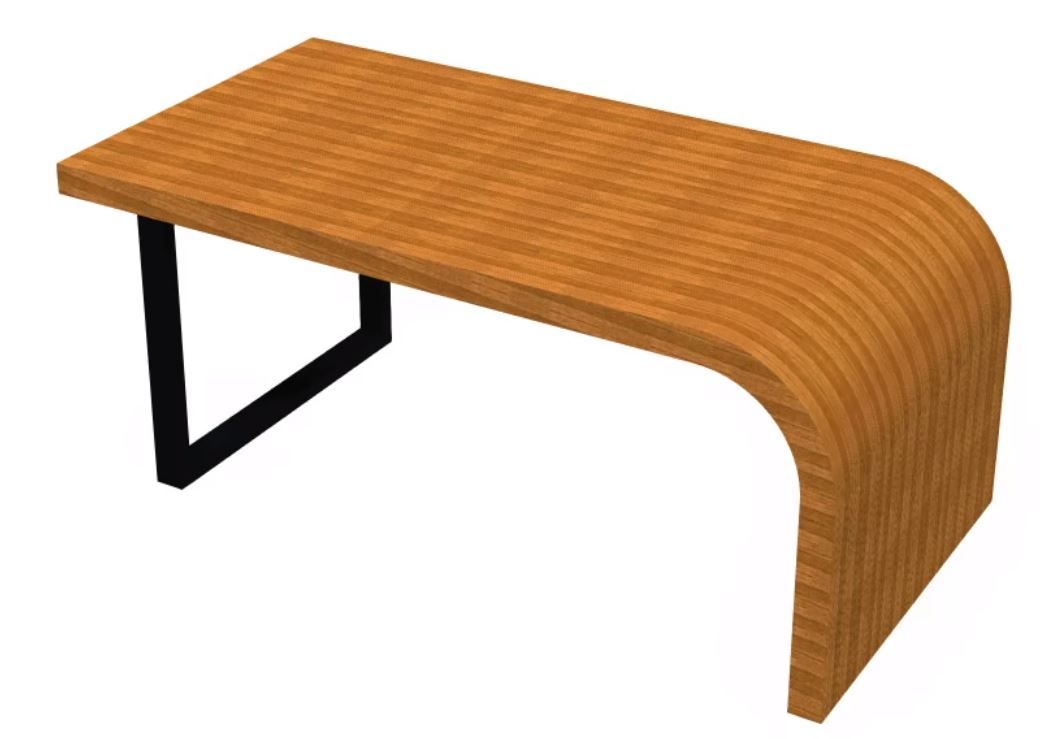
This workpiece has three surfaces: one horizontal, one vertical, and one curves surface that attaches the other two together. To obtain the desired finish on this piece, the robot's sanding motion must be parallel to the wood grain as pictured below.
Determining the Correct Force
The right amount of force will need to be used.
Using too much force can cause the sander to operate slowly and create scratches on the piece, as well as decrease the life of the abrasive medium chosen, while too little force will not remove the desired material.
We recommend using a force torque sensor to ensure the robot applies the desired force while following the trajectory. A force torque sensor is needed when there are any differences in work pieces, and when the robot needs to adapt to the surface's contour in real-time. This will also ensure that pressure is distributed evenly to maintain a level surface.
Selecting an Abrasive
The initial condition of the workpiece will determine the type of abrasive that needs to be used.
When looking at different sandpapers, they are categorized and rated by a grit number. The higher the grit number, the finer the abrasive will be. Take a look at the cross sections below of each grit of sandpaper to get a better visual of this. 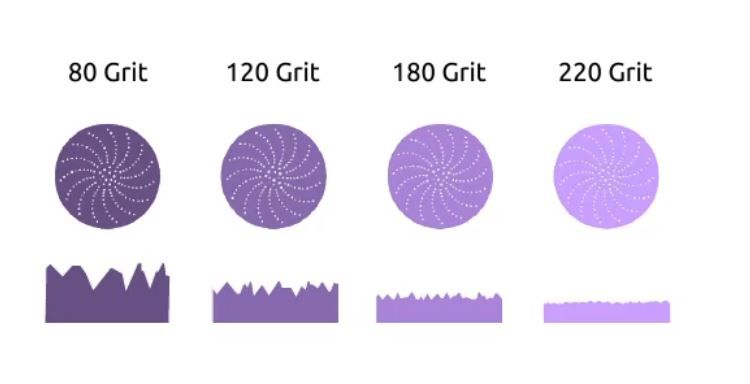
When you start your sanding process, you'll need to start with a coarse enough sand paper to remove any imperfections quickly.
Then, you'll switch to a finer grit to remove any scratches that the previous grit may have caused.
This is an extremely effective method to get your surface to the desired smoothness. There is, however, no fixed rule for progressing through the grits. One rule of thumb that we like to use is not to skip a grit, because you'll find that a coarse one will leave deep scratches that successive finer grits might not be able to remove.
It's important to keep in mind that different organizations around the world have developed their own grit numbering systems, so even though a grit number could be the same in two systems the roughness will not always be equivalent. All systems classify in descending order with the lowest number being the coarsest and the highest number being the finest. You should always consider which system your sandpaper manufacturer is using when making selections.
Optimizing Cycle Time
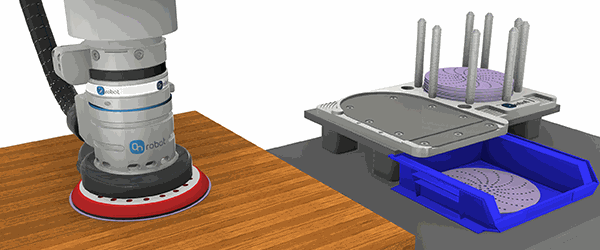
When running the fully automated application you can optimize the cycle time by using a grit changer. This allows the robot to automatically change out grits without an operator getting involved or the process coming to a halt.
You can see what a grit changer looks like on the right hand side of this image below. In this design, the robot arm dispenses the original grit using the dispensing pad on the left side of the unit and then moves to come down onto the new grit located on the right side.
Robot Cell Alignment and Hose Routing
Now let's talk about how we present the workpiece to the robot. Your robot needs to be mounted where it can reach the complete surface without overextending the arm.
If it does overextension does occur, it can cause high torque on the arm and create vibrations which will negatively impact both the robot and the surface finish.
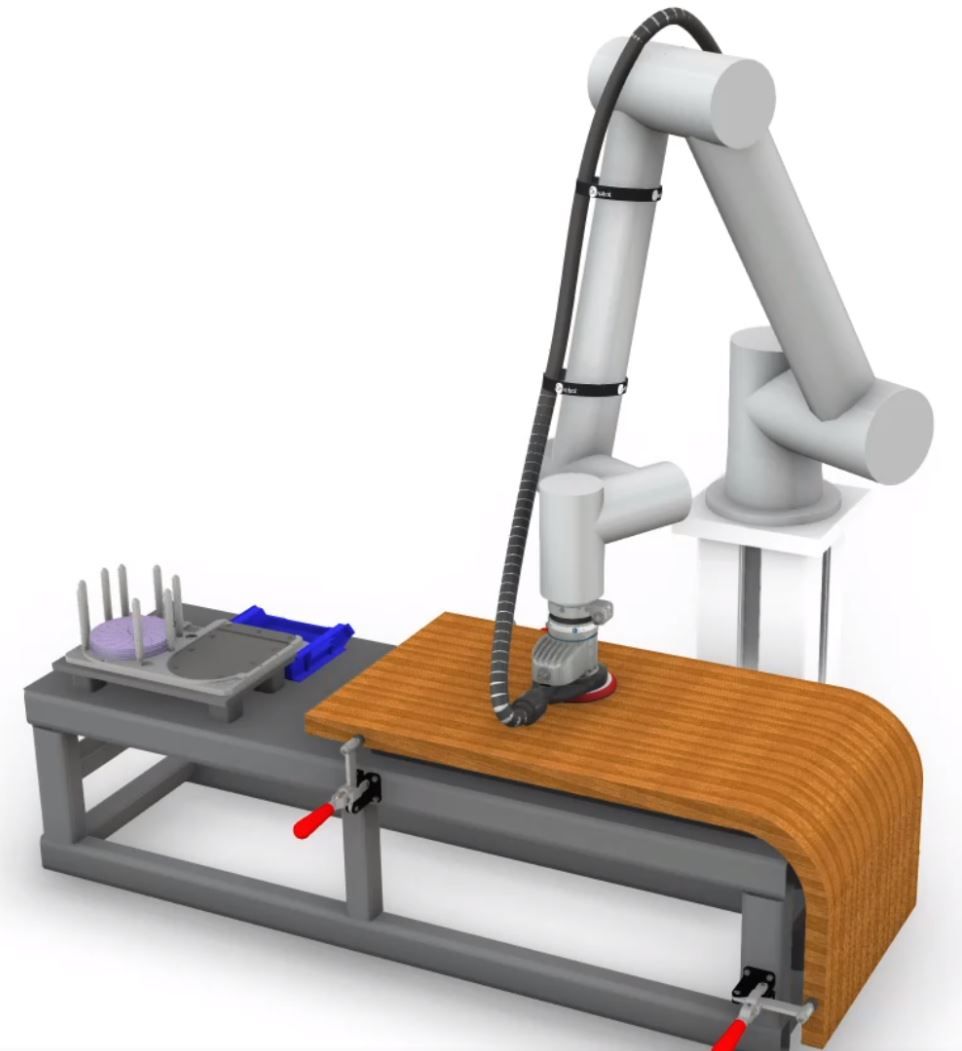
An additional attachment that is used in robotic sanding applications is the vacuum hose. These are used to collect all of the debris coming off of the workpiece. It's very important to take into consideration how the hose is routed onto the robot, and ensure it is secured. If it becomes tangled when the robot makes a certain motion, it could disconnect or restrict the robot. You can see a traditional routing method in the image on the left.
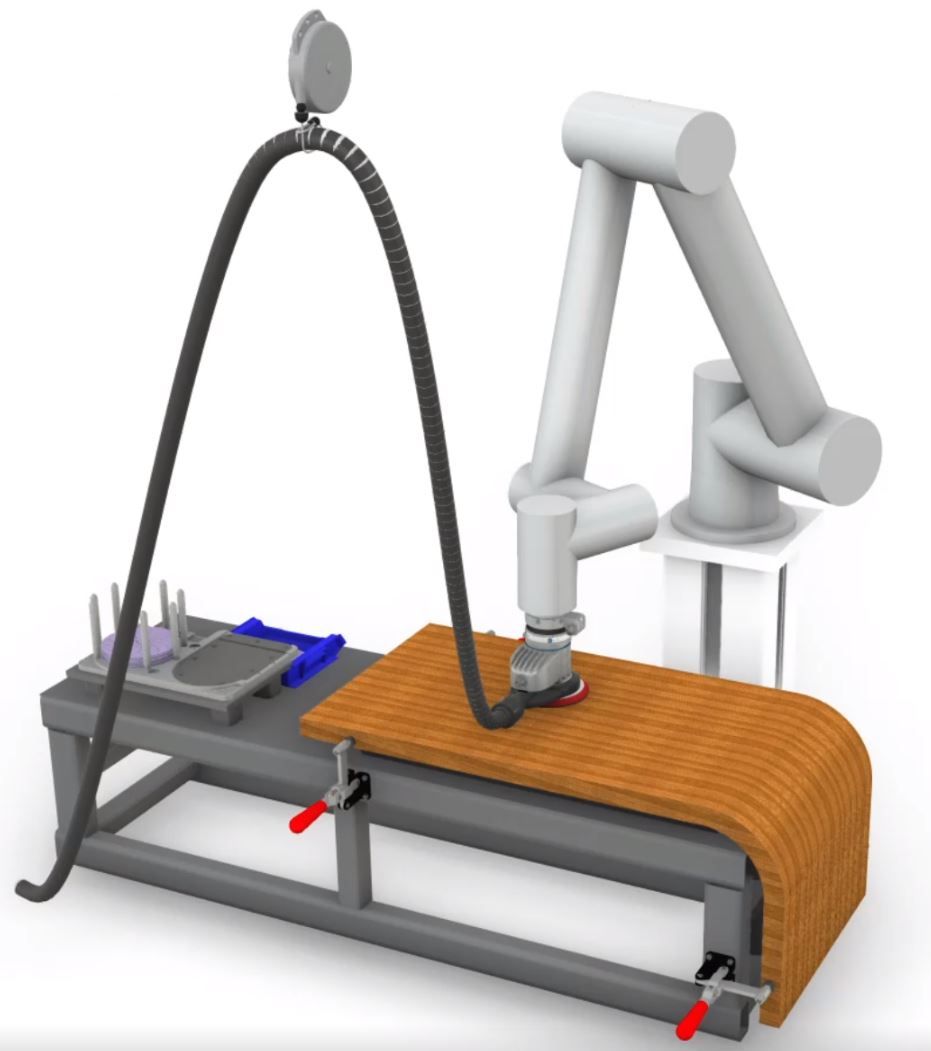
Some applications have the robot joints rotating considerably which makes traditional hose routing challenging, and when these occur then a great solution is using a spring balancer, pictured on the right. This holds the hose, rather than having it secured to the arm. You do, however, need to make sure that there is no restriction to the arm at any desired range of motion.
Sanding applications vary on a variety of levels. If you're considering automating your sanding process and want to get guidance from professionals, don't hesitate to reach out to us.